Occasionally I will use the blog to post the results of a shoot of some sort. This is certainly a learning process, so I will share what I am discovering as we go along...
After a long and fairly productive HS football season, I was pretty eager to get indoors out of the cold and try my hand at basketball. The last basketball games I shot were in 1995, when I was still a student, so my timing is still pretty bad. The
Kaufman holiday tournament was a good warm-up and I was back to see the Lady Lions face the Lady Dawgs of Venus last Friday.
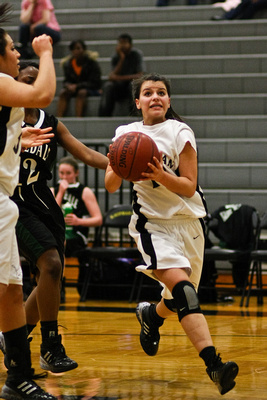
 Canon 40D, ef85mm, f2.0, 1/800, iso1600, no flash
When I arrived, the JV game was in full swing, with the Lions enjoying a comfortable lead. Kaufman dominated throughout with a final score of 50-22.
 Canon 5D, 24-70mm, f2.8, 1/400, iso 1600, no flash
It was the more of the same for the varsity squad with a final of 41-18. I did not take notes, so you will have to pick up a
paper for the details...
With any sport photography, one of the main concerns is having enough light to get a fast enough shutter speed to stop action. The KHS gym is pretty good in this regard, but you do have to have a camera that can take advantage of it by pushing the ISO up to at least 1600.
My Challenge then? Bring a 3 year old Point and Shoot camera to see what I could get. The answer... not much, but I do want to play with settings and try again.
 Kodak v530, f4.5, 1/8, iso 160, no flash
As you can see, the shutter (which cannot be manually set) was too slow to stop any action. Panning to get a cool effect is difficult as well because of the lag time of the lcd screen on the camera.
My best results came from forcing the camera to underexpose, then bumping it up a lot in Adobe Lightroom after the fact. Color looked horrible, so I move it to black and white. It looks a lot like shooting B&W Film back in high school!
 Kodak v530, f4.8, 1/100, iso160, no flash
Fun as that experiment was, it got old really quickly. Back to the DSLRs.
Shooting basketball can be fun because of the constant action. Unfortunately, it requires players to spend a great deal of time with their arms in the air, defending, shooting or passing.
 Canon 5D, 85mm, f2.0, 1/640, iso1600, no flash
Players are crossing between the camera and the ball often, which can really mess with the autofocus. If I manage to keep the right player in focus, it can make unique looking shots.
 Canon 40D, 85mm, f2.0, 1/800, iso1600, no flash
In the end, it all comes down to timing, and staying ready to shoot. Taking a second to see how the last shot looked on the LCD is almost a guarantee that something dramatic is going to happen and I get no picture of it. This seems to happen most on defense, so I decided to stay on it and caught this nice steal by #10 Sammatha Offord.
 Canon 40D, 70-200mm, f2.8, 1/400, iso1600, no flash
She is very quick, and the Lady Dawgs did not handle that very well. Which resulted in a lot of variations of this picture.
 Canon 40D, 70-200mm, f2.8, 1/400, iso1600, no flash
Shooting from the top of the home bleachers gives an interesting perspective and often the court floor makes a clean background for the action. Bleachers are ugly.
I like to try to time the free throw and catch the ball in the basket... nothing spectacular yet, but a fun exercise nonetheless.
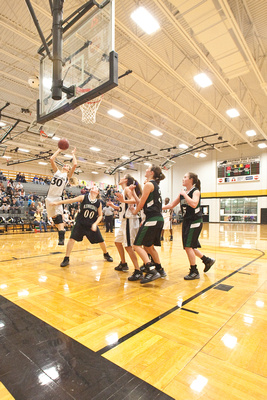
 Canon 5D, 70-200mm, f2.8, 1/320, iso1600, no flash
Since I am trying to sell prints of these photos to parents (available
here), I try to get some fairly close shots. Sometimes it works, sometimes not, but you are guaranteed to capture some fun expressions and hair flying around...
 Canon 40D, 85mm, f2.0, 1/800, iso1600, no flash
A thought on showing context in a photo....
The cheerleaders were doing their thing, and during a timeout did some sort of pyramid. Zooming in on the top cheerleader was a nice shot with a clean background... but no context of the fact that she was standing 7' in the air on the hands of her squadmates...
 Canon 5D, 70-200mm, f2.8, 1/320, iso1600, no flash
Giving the whole picture meant cluttering the background, but without seeing the whole picture, the drama of the moment is lost.
Canon 5D, 70-200mm, f2.8, 1/320, iso1600, no flash
Here are a few more shots from Friday. The full set of keepers is
here.
 Canon 5D, 85mm, f2.0, 1/640, iso1600, no flash
 Canon 40D, 85mm, f2.0, 1/800, iso1600, no flash
 Canon 40D, 85mm, f2.0, 1/800, iso1600, no flash
 Canon 5D, 85mm, f2.0, 1/640, iso1600, no flash
Have a great Monday,
don j.


